Exciting Updates and New Collection Launch!

Hello, dear readers, how are you all?

It was strange not being here for a week, but I hope you’re excited about the news I have to tell you this week. After all, this week we have an incredible launch of the “Just Keep Going” collection, which is an invitation to the new year to make our resolutions, remember the good things that happened to us in 2023 so that we can be stronger in 2024 and continue despite the obstacles that appear.

This image has an empty alt attribute; its file name is 1704390637-SD-Just-Keep-Going-collection.jpg

I invite you to explore this new collection and take advantage of the 60% discount valid until January 16th. And, as the entire store is offering a 50% discount on all items this month, the individual packs from this collection are also part of this great celebration if you prefer to have just one part of the collection.

The girls on the team made some examples for you to better understand the elements of this beautiful collection; let’s take a look:

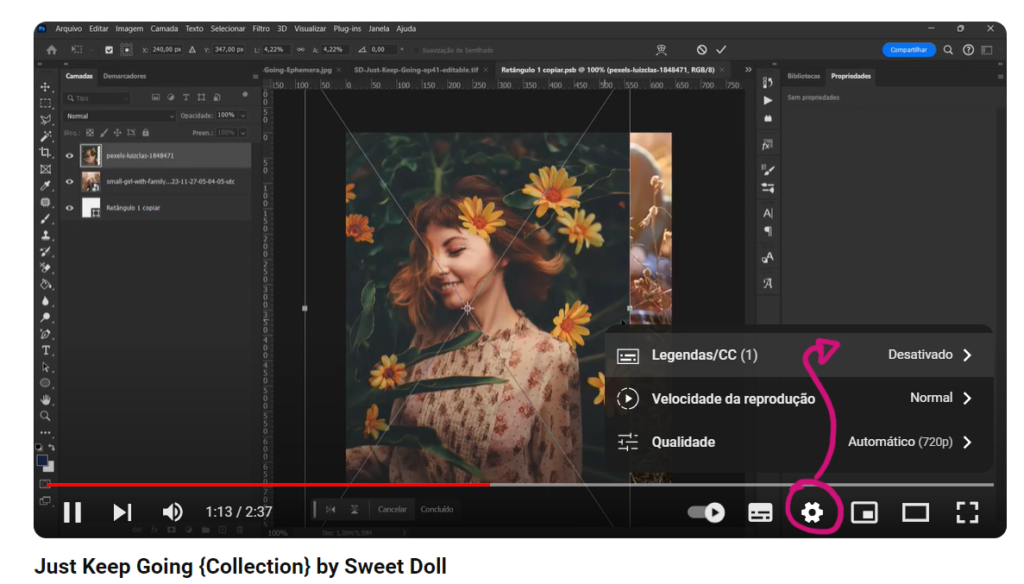
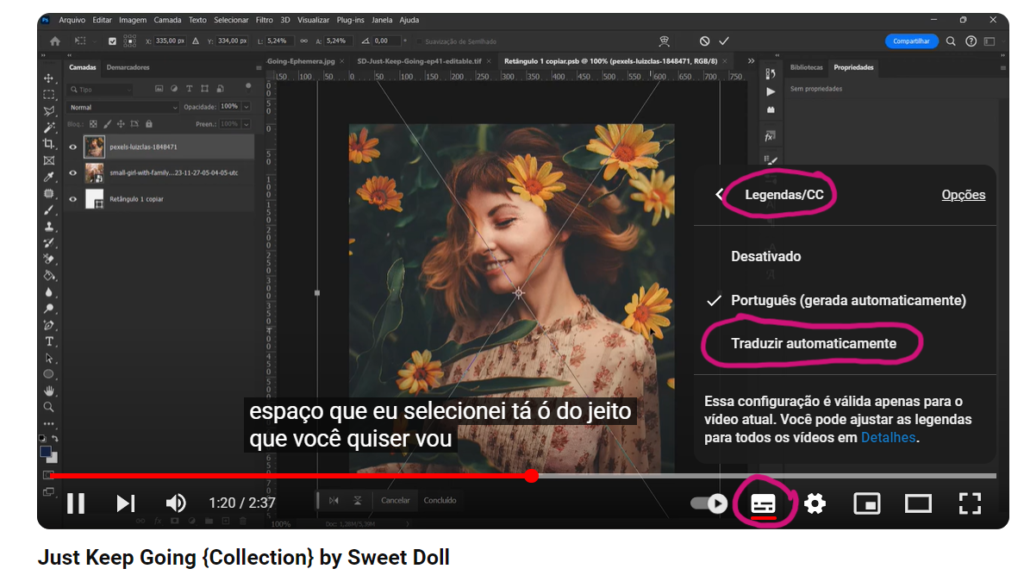
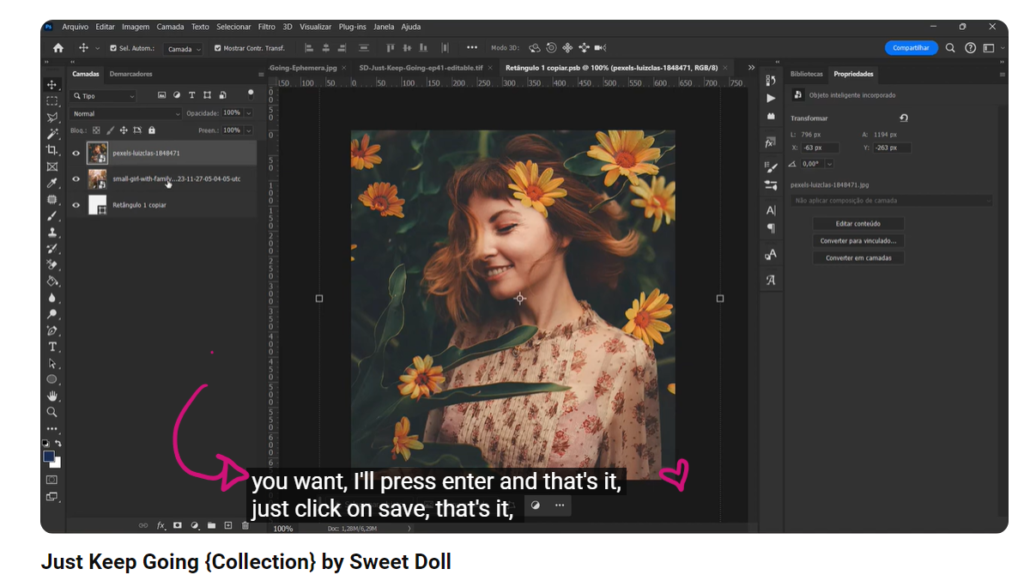
I took advantage of one of the elements in this collection to make a mini tutorial for you to see how to use this feature and customize it as you prefer. Go to the blog to watch, and don’t worry; I’ll also explain how to generate automatic subtitles on YouTube so you can see them in your language.

I think that’s it for today; I hope you all enjoy this week’s releases and have a great weekend!

Hugs,

Kel

How to use the editable photo in the Vellum pocket element from the new ‘Just Keep Going’ collection?

Hello! I’m excited to introduce a new series to the blog, featuring tips and tutorials on using elements from my products. I’ll also share valuable insights to make your scrapbook pages more realistic and beautiful.

In this inaugural tutorial, I’ll guide you through using an element from the latest collection. However, you might notice that this editable element is also available in other collections, presented in .TIF format. It can be opened in Photoshop for easy customization with the photo or paper of your choice.

To make things even simpler, I’ve created a quick and easy video to help you understand how to incorporate it into your pages. The video is in Portuguese, as my spoken English isn’t that great. But don’t worry! Below the video, I’ve provided instructions on how to enable automatic subtitles on YouTube, so you can watch it in your preferred language.

How to generate automatic subtitles in my language on Youtube?

1. Click on the Settings (Gear) Icon: Look for the settings icon, which is usually represented by a gear symbol. You can find it at the lower-right corner of the video player.

2. Select “Subtitles/CC” Option: Click on the “Subtitles/CC” option from the menu that appears after clicking the settings icon.

3. Choose “Auto-translate”: Within the “Subtitles/CC” menu, there should be an option called “Auto-translate.” Click on it.

4. Select Preferred Language: A list of available languages will appear. Choose the language you prefer for the subtitles. YouTube will automatically translate the subtitles into the selected language.

5. Adjust Settings (if needed): Some videos may have additional settings, such as font size and color. You can adjust these settings based on your preferences.

6. Enjoy Watching with Subtitles: The video should now display subtitles in your chosen language. Enjoy watching the video with automatic subtitles!

Discover other products that have this element for you to personalize:

  • Time to Hygge {+ephemera}
  • Let it Snow kit 
  • Happy Thoughts kit

I hope you enjoy the tutorial, and if you have any questions, feel free to leave them in the comments.

Hugs,

Kel